Resources
On your website, images can be used for a variety of reasons: to enhance your website, to illustrate stories, in ad displays, as stand-alone “a picture is worth a thousand words” meaning-rich tools, and sure, on social media. Adding images in WordPress is very easy. All of your images will be stored and can be managed in the Media Library.
Best Practices for Working with Images
- Always resize and/or crop an image to fit the space it should fill.
Uploading large image files may look like they are being scaled down because of your column widths, but the website is still loading the full size file when someone visits the page. - Avoid including text within images.
Search engines and screen readers cannot "see" text contained in an image, so the content does not appear to be present from an SEO and ADA perspective. - Remember to include "Alternative Text" when uploading images.
This presents a text description that will display should the image not load visually, such as to search engines or visitors using screen readers.
View the Media Library
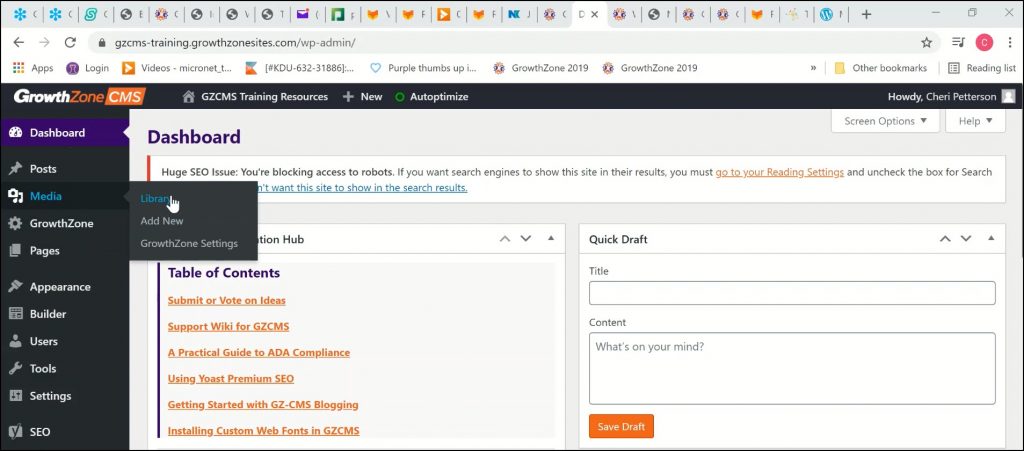
To view the media library, click your site name in the header bar

Hover over Media in the left hand navigation panel, and select Library.
The Media Library will display all media that you have imported into the system. You can filter by media type, dates, or search the library.
Add Images to the Media Library
Access the Media Library as described above
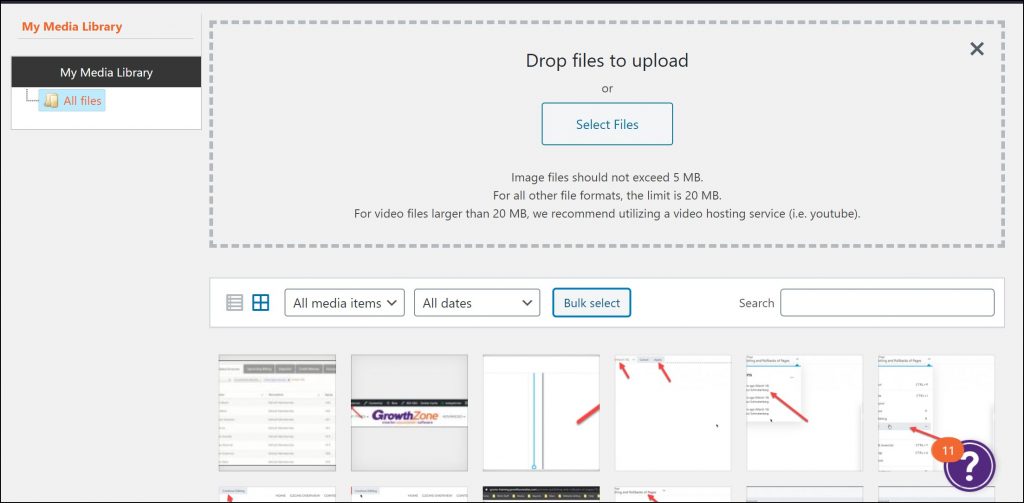
Drag & Drop the desired file into the library or click Select Files to navigate to the desired file.
Once the file is uploaded you will be able to add the following:
Alt Text: Controls what text replaces the image in case of slow-loading sites, or for readers using screenreaders and other assistive technology. Best Practice: Describe (for non-visual readers) the contents and purpose of the image in the alternate text. For ADA Compliance images must have alt text.
Title: What you call the image and is for you to search the image later in the Media Library.
Caption: A caption is the small piece of text that appears beneath an image, usually to give it additional context or provide source attribution. While image captions might seem like a small thing, they can demand even more attention from readers than the regular text in your content.
Description: An optional description of the image that will display on the image’s attachment page (if you choose for the image to be linked to its attachment page).
File URL: The full direct link to where the image is stored on your site. This cannot be changed.
Custom Link: Custom links allow you to attach specific URLs to images in your WordPress image or video gallery so that when your readers click on them, wherever they appear, they will go to the associated URL.

At the bottom, you’ll see some information about your image: the image file name and type, the date the image was uploaded, and the image dimensions.
FAQ: Do you have stock images we can use?
Add Images to a Page
Navigate to the page to which you wish to add an image, and click Page Editor in the header bar

Click the + sign in the header bar, and select the Module tab
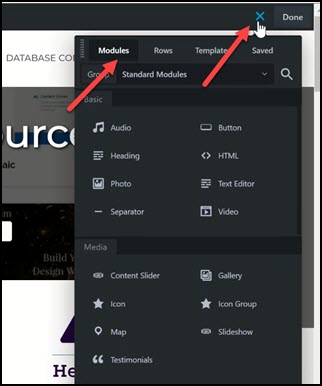
Drag & drop the Photo module to the desired location on your page
Resizing Images
With the incredible flexibility of GZCMS, the media library will allow you to upload images of any shape and size (up to the max file upload size of 5MB per image). Having images larger than the area where they are displayed can cause your page to load slowly, so we recommend cropping and resizing images before uploading them.
For example, if your photographer provides a headshot that is 4000 pixels wide, that might be twenty times larger than what you need to display on your page! Scaling the image down to 200 or 300 pixels wide will dramatically decrease the file size, which in turn will help your pages load faster and improve your SEO.
FAQ: How do I resize an image?
Please note: we do not support or partner with Pixlr in any way, and any use of this third-party website is subject to their terms of use. These instructions are for informational purposes only.
Maximum Image Size Guidelines
For images that should span the width of your content area, you shouldn't need anything wider than 1200 pixels wide.

For images that should span the width of a two-column area, you shouldn't need anything wider than 600 pixels wide.

For square images, ads, or profiles photos, you shouldn't need anything larger than 300 pixels wide.

Below are a few examples of common profile or headshot sizes for your reference.
Tall Portrait: 200x300 pixels

Wide Portrait: 200x250 pixels

Landscape Profile: 300x200 pixels

While many widescreen monitors may be larger, you should not need any images more than 1600 pixels wide to fill a full-screen background area. Any images larger than 2000 pixels wide should be scaled down to optimize page load.
The below image background is 1600x900 pixels, and can be expanded to fill most wide screen monitors without noticeably affecting image quality.